Monday, January 28, 2013

Pinterest Pin Test: DIY better than shellac nails

For any girl with chronically chipping nails you know yourself how exacerbating it is to have them chip the same day you paint them. And I've also been amongst those who drop $20 plus to have fake nails put on monthly so I didn't have to worry about re-painting my nails on a daily basis. When Shellac nails became popular I got rather excited to only be disappointed. Not even they could last more than five days and they still cost $20 plus per set.

Well wait no more, because I tested this pin out for the past week and my own DIY home gel nail set are still going strong. I found this idea here, and was even more happy that I wouldn't have to buy a stupid UV lamp, plus splurging lots of money of special nail polish's for a shellac set and not mentioning the top and bottom coats: only one $5.99 product was needed because I could use it with my own favorite polish color.

Necessary Items:
favorite nail polish
Gelous Advance Nail Gel Coat (available at Sally's)
Quick Drying Top Coat


Steps:
1. Layer of Gel 
2. Layer of color
3. Second layer of color
4. Layer of Gel
5. Layer of quick dry top coat
6. Let dry and enjoy!


You can bet I'll be doing this from now on! No more wasting money at Nail Salons for something I can do myself.

Saturday, January 26, 2013

Aspen became an adult today

I dropped her off bright and early at Orem Spay and Neuter Clinic to have her fixed. Hope she doesn't hate me when I pick her up. I honestly felt so guilty leaving her, she looked so scared. And she's my little baby, even though she was 'Jared's' she's really become mine.

Loving on her rawhide bone...she's possessive of that like I am of food and that's saying something

We were a little late to the game getting her fixed. I waited and waited after she turned six months old to make the appointment because I was hoping that could wait until she was a year. But after sitting a friends male dog who kept (innocently) humping Aspen even though he was smaller, I decided it was time.

'Good morning mom...WHAT do you want?'

So here's to caring for a loopy puppy, and here's to Adi probably harassing Aspen when she's not going to be too groggy or in pain to move. And here's to her having accidents the next couple of days...oh joy!

Such a curious little buddy

p.s. any tips or tricks to helping them relax and recover?

Thursday, January 24, 2013

Say What?: bottom of a purse

In following up with the last Say What? and the fact that I'm giving in to my germaphobe-side I remembered hearing about this a couple years ago and didn't really want to believe it. But after doing the research I got really grossed out. Rather typical.

Following up from not only my new purse, and the fact that its flu/cold season but the fact that the bottom of the average purse has more germs on it then the bottom of your shoe makes sane minds try to contemplate how dirty the bottom of their purse is.


From E. Coli and fecal matter, to viruses that cause skin infections and multiple strains of the cold or flu viruses the average purse has anywhere from hundreds of thousands of germs on the bottom to tens of millions. Think about it: everywhere a woman goes so does her purse. On a normal day my own purse touches the floor of the car, to the lunch tables at work, to my locker, to the floor while I put on my coat, to the check out stand or floor while I check out at multiple stores, and back home to my kitchen table.

You may be thinking, "Well that doesn't matter, it's not like I lick the bottom of my purse" but think about where you're transferring all those germs into your own home...kitchen counter, passenger car seat, couch, chairs. and then you or family members might touch those surfaces and then accidentally touch your face or mouth or eyes. And these germs don't die because they're not on a living thing, if that was so no one would ever get sick. Flu or cold virus can live longer than 48 hours and you would think it doesn't survive as long on hard, plastic, or metal surfaces and you'd be wrong. It actually lives longer than on fabric and soft surfaces.

It's really very easy to keep this bacteria and virus transport system ineffective. Just clean the bottom of your purse, and make sure to use Clorox wipes to kill those tough viruses as well. Genius idea right? But honestly, I can't tell you that I've ever regularly done that. Clearly I need to start.

p.s. Worried about hurting your leather purses? There are special cleaners for those.


Monday, January 21, 2013

Pinterest Pin Test: deep cleaning your washer

Yet again, I am all for easy cleaning solutions where no elbow grease is required for successful results. I found this pin really by happen-stance and since we've only had apartment washers that have been in them for years if not decades, thought that this would be ideal to clean them from now on when we move in.

 Here's where I found a great explanation of the how-to which was quite short making it even better.

1. Fill washer with hot water and add 1 qt. of Chlorine Bleach
2. Let agitate and cycle
3. Fill washer with hot water and add 1 qt. of Vinegar
4. Let agitate and cycle


How easy is that?! Love it! Honestly, to see how gross the water was before it drained was NASTY. Anyone who moves into an apartment should definitely do this, and than everyone should do it yearly at least if not more.

Happy Maniac Monday, clean away!

Saturday, January 19, 2013

Have you ever heard of...

flour developing mold? Disgusted and baffled doesn't even begin to relay my reaction to finding that the container I had been holding my baking flour in since I got married had molded over in the bottom of the container. I didn't even know mold could grow in flour, like green mold. Fuzzy. Get the picture yet?


I think the culprit of this story would be the containers since they are glass, not air tight, and the lids come off frequently. Could it be where I kept it? On top of the fridge? Maybe the flour I bought was older and closer to going bad? Does flour even have an expiration date? As you can tell, I'm quite uninformed on this topic. Feel free to answer any and all of these questions.


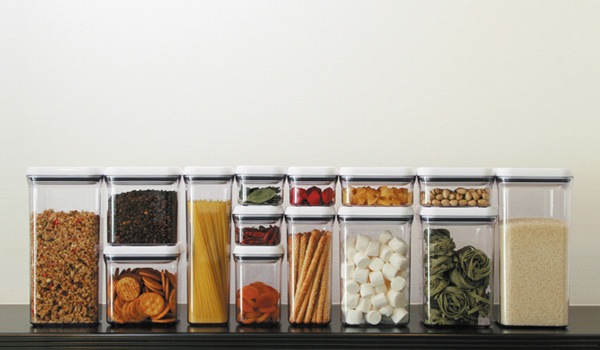
My SIL referred me to these air tight containers in the mean time and I definitely am planning on going and buying quite a couple tomorrow. You know a separate container for my flour, wheat flour, sugar, brown sugar, powdered sugar, bulk brownie mix, bulk pizza dough mix, and ground coffee (for a bread recipe I often make). So for now, crisis averted. But it's funny that I thought I would be a genius i.e. know everything after I spent four plus years in college. And now that I'm almost done with that accomplishment I realize I have barely scrapped the surface. Scary thought. Especially because I like to know everything. And why yes, I would consider myself a know-it-all.

Friday, January 18, 2013

Trading Up

For quite some time, probably years now actually, my poor well-loved Coach has needed to be put on the shelf and treated as an antique. I've been waiting and biding my time for a great deal on a purse at work and I definitely lucked out! I helped a customer return this purse, and as soon as I finished the return I turned around and put it on hold for myself. Dooney & Burke's for under $100? Unheard of!


Just another reason why I love my job! But my husband hates it. Oh well.


It fits all my absolute necessities without allowing lots of extra stuff that seemed to always accumulate in my Coach, and this also means that I get to cross another item off my Bucket List. 

Nothing makes me happier!

Monday, January 07, 2013

Pinterest Pin Test: moldy showers

As part of my blogging NYR's I wanted to do something that was applicable, and informative. If you're on Pinterest you know that there are tons of how-to's for easier cleaning or DIY's. You may be pinning interesting things, but I want to know that they actually work. So this will be a testing and revising process for those nifty little tips to see if they actually work so you don't waste your time with them if they don't.

The Pinterest Pin test that I selected for this week was something that I was really really hoping would work. It was pretty simple concept for removing the black mold/stain that occurs in the caulking of the tub. Ours was kind of bad when we moved in, and after a year of living here it got to be horrendous! It drove my OCD side nuts looking at it every time I got in the shower, and made me deathly embarrassed if anybody saw it. I was determined to give this one a fighting chance but I was honestly doubtful the whole time. My pin led my to this blog, where it explained pretty basically how to do this project.

All you need for this is bleach, and Beauty Coil from any Sally's or Ulta type store and I would also suggest a disposable bowl to soak the Beauty Coil in which is essentially a 10 ft. cotton ball. Also get the smallest package of Beauty Coil you can find, mine was a 10 ft. box and I barely used up three feet but also it depends on how extensive the stained area of your tub covers. You can always keep the remaining for the next time you need to do it.

Directions:
Fill your bowl with bleach
Measure out the Beauty Coil piece that will cover your black caulked area
Soak the Beauty Coil in the bleach and gently put it on the area, completely covering it
Leave for 45-60 minutes depending on how bad your mold stains are

The 'set up'. Be aware it made the bathroom potent so I left the fan on the entire time.

My before picture


And my after picture

Amazing improvement right?! I was kind of suspicious that it was that easy, but definitely the best cleaning trick I've found in a long time. 

Result: It works folks!

Do you think you'll try it? It's so easy I absolutely suggest you do!